
I’m going to use a lot of anatomical terms, I might as well provide the reference – click for full size image
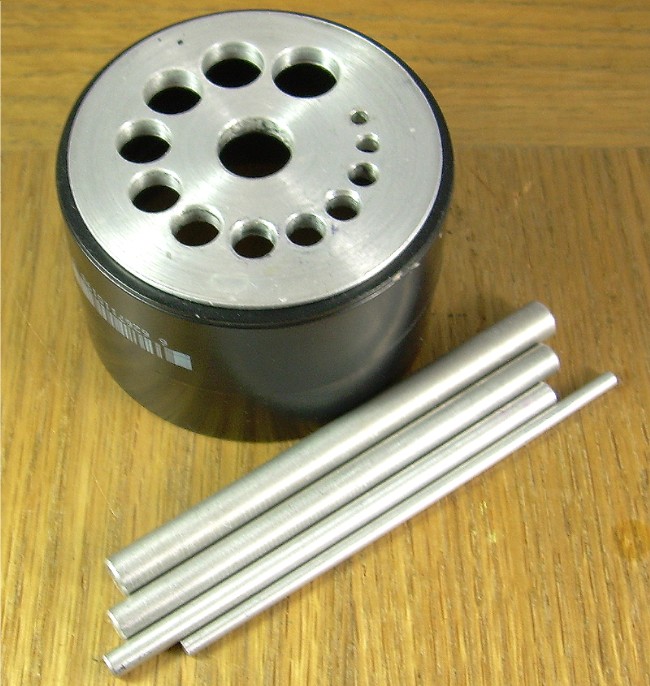
Tools you will need:
- Thumbs
- Magnifier
- Brass shims or sheets
Tools you may need:
- A heat source
- Knock-out block
- Feed drifts
- Mallet
This is a point at which the technical act of pen repair slides into art. What follows is actually a somewhat advanced technique, and trying it without the tools mentioned is apt to lead to breakage. Proceed with caution, and consider whether, if you’ve not practiced on pens already otherwise damaged to the point of uselessness, it might not be wiser to let someone else do this for you. There is a small but real risk of damaging the point.
When a pen has poor ink flow, and it has already been cleaned thoroughly, it may be that there is a problem with the slit in the point. An overly damp point is almost certainly an issue of an over-wide slit. Diagnosis is the first step, and all but the inhumanly near-sighted will need a magnifier for this.
 Look at the back of the point. The sides of the slit may be parallel or may gradually come nearer at the tip, but they should not actually touch with the exception of right at the tipping. If there is contact, or the space between the tines seems unnecessarily wide or actually widens towards the end, the problem is in the point and one may proceed following this page. If not, the correction lies elsewhere.
What happens next depends on whether the pen is writing too dry, or too wet. Each is arranged in ascending order of difficult; read through before jumping in.
Too Dry
First technique: If the pen is only very slightly too dry, then the solution may be to be a bit of a heavy-handed brute to the pen. This solution will work only with stiff-pointed pens, and I hesitate to suggest it because it verges on abuse. It is also more useful for points which have a decreasing gap to the slit, and rather less useful where the slit’s sides are already parallel.Put a piece of paper on a firm flat surface like a table-top, and hold the pen as if writing at a very shallow angle. Holding the point against the paper, very slowly but firmly increase the pressure on the point, watching closely the whole time to see how the tines are reacting. This technique also requires attention to how the pen is feeling (something a rather more talented pen-fixer than myself calls seeing with your fingers); if there is some small shift in the feedback from the pen, a change in the resistance offered, release the pressure. Overdoing this can spring a point (the right-most of the images above is shows an early stage of this) and that’s a whole different ballgame.This is, in may ways, an unwise thing to attempt
Don’t attempt a big change all at once. Press a bit, check the point through the magnifier, press again if the gap is still too small. Also be careful to keep the pressure even on the two tines, or the problem will become one of misalignment, a rather more involved problem. The best aspect of this way of changing flow is that it requires no dismantling of the pen, and can even be done with the pen filled and not make a mess of one’s fingers.
Second technique: This is somewhat messier if the pen has ink in it, but is less likely to lead to ill consequences with a moment’s lapse of concentration. In short, it is gripping the tines and gently pulling them away from one another.
If extremely lucky, this can be performed with the point in the pen. One gets a thumbnail up under each of the point’s shoulders, grips the tines, and pulls one away from the other. Depending on the relative fits of point and feed, it may be impossible to do this without removing the point from the section; refer to the instructions for that procedure.
Whether the point has to come out of the section or not, one must once again exercise caution to not over-do the job and proceed in small increments. While the possibility of going disastrously too far is much smaller than with the previous technique, the result will be a point that either writes altogether too wetly or has so much space between the tines it can’t write at all.
Third technique: The best way to proceed is to get ahold of some brass shims or sheets of brass. My own toolkit includes a set of sheets from a hobby store, in 0.001 to 0.005 inch thicknesses. The most useful for this pursuit are the larger ones, while the smaller are more useful for cleaning lumps of ink from between the tines.
As with the previous approach, it may be possible to work without pulling the point out of the section, especially if the point has a breather hole. Insert the shin in the breather and pull gently down to the point. Don’t push the shim into the slit too deeply, since gouging the feed is contrary to the goal. Really don’t use a knife of any sort for this, as the gouging of the feed becomes more likely. The reason for using brass is that it is less likely to gouge the material of the point.
If the point does not have a breather, or if it is extremely tight, it will be necessary to remove it from the section, and work from the tip. Go carefully, since the tipping may get knocked off working in that direction. It may be necessary to press the point on something to open the slit enough to make the initial insertion, which opens the same sort of concerns as the first technique but is less likely to cause trouble as there’s less pressure involved.

Very gentle pressure does the trick
First technique: If the tines are slightly too far apart, it is possible to close them by pressing the back of the point against a firm surface, Be careful with this, as too much pressure will bend the point in such a way that the pen will demand to be held at an unworkably low angle (apart from making the pen look funny). The tip of the pen should not droop much more than a degree or so below the plane defined by the lower back.
This way of correcting the problem is possible to attempt while the pen is full of ink.
Second technique: Where the gap is too large to be addressed by the previous approach, there is only one option remaining. This option can sometimes be done with the point where it is, but often requires the point to come out of the pen and that begins to be a major undertaking. As a matter of fact, it is best viewed as a major undertaking anyway, since what we’re considering is a fairly serious manipulation of the tines and is a procedure that should only be pursued after some practice on expendable
As a model, hold up your left hand and examine the index and middle fingers. Now, cross them, so that the nail of the index can be seen peeking out from under the middle. Cross them again, with the index finger on top. Now… imagine your fingers are the tines of the pen, and your nails are the tipping.
To commit this act, hold the point in both hands, gripping it by the shoulders. Deflect one tine up, the other down, and press gently inwards until they cross. The major peril here is that the tipping will get hung up on its sibling across the slit, which can lead to the tipping snapping off. Retipping a point is extremely expensive, and not to be courted.
The slightly lesser peril is that too much enthusiasm in the lifting and pressing will deform the tines badly. The reason for knocking out the point to do this is that with the feed in the way, the only direction the tines can bend is upward, and this increases the chances of a deformity. Avoiding deformity is also the reason for making sure each tine has a turn on top; up and down bending is balanced. Once the process is complete, there is likely to be a little time spent making sure of the alignment of the times.
If you found that useful, or entertaining, and want to cast a few pennies in my begging bowl, you need but click the button below.