Ravens March Banner and home link

Link to the Collection PageLink to arguement for fountain pensLink to How Pens Work pageLink to Use Guide
Link to Care GuideLink to Repair pageLink to Links page


Note:  until some more pages are made on the Book side of the site, there will be some esoteric terms without explanation on this page.  I'll fill in blanks (or links) as I can.  Likewise, the link buttons above will return you to Pen-sylvania.
Book Repair Job

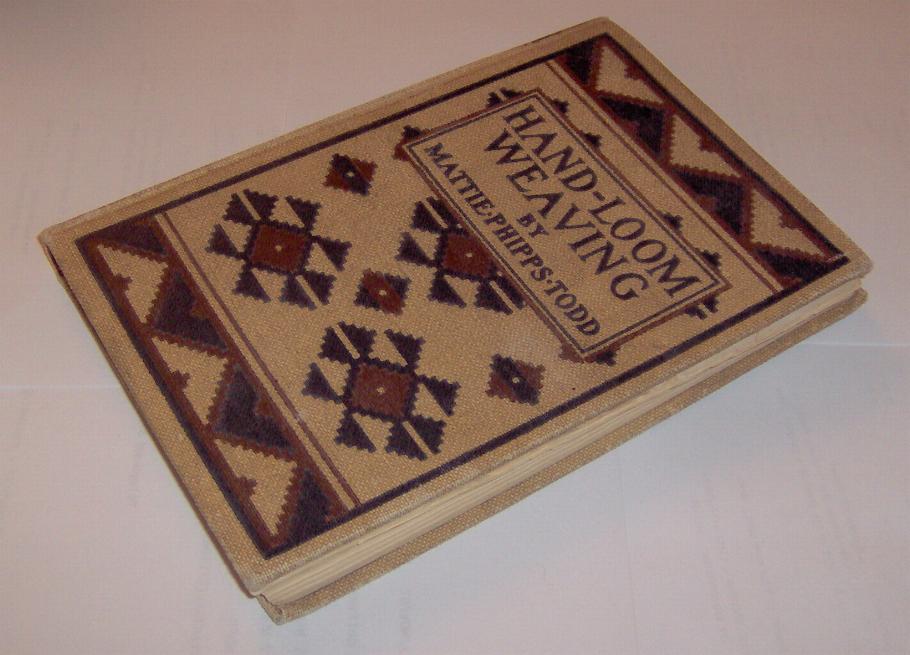
Hand-Loom Weaving by Mattie Phipps Todd

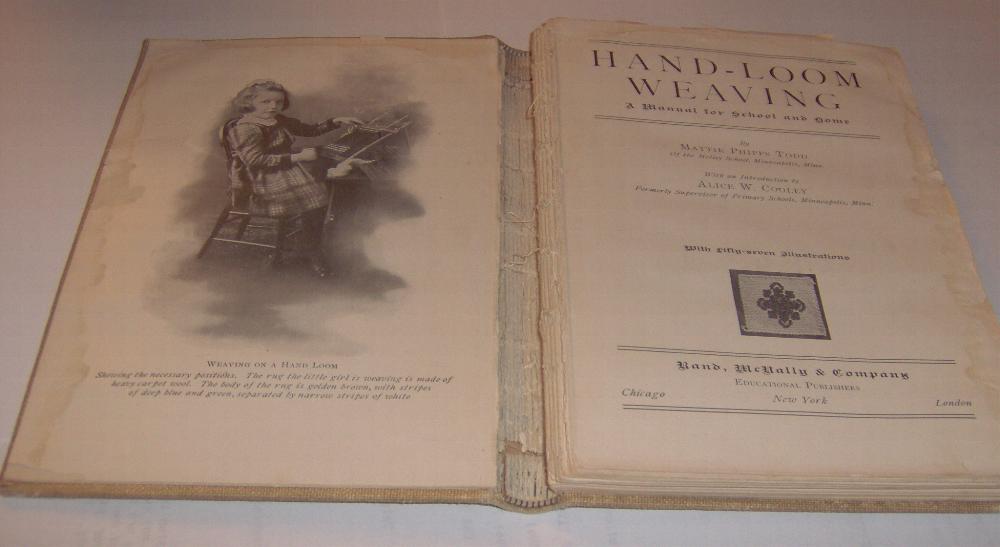
This is a book which I offered to repair for someone just because it hurt my heart to see it coming to bits as it was.  As you can see in the above picture, the cover was in reasonable shape, but once it was opened...

All signatures loose from spine.

Horror!  A popular edition, it was sewn directly onto the crash (a cheesecloth-like fabric commonly applied to the spine for more strength in gluing, like rebar in concrete), and as the years took the flexibility out of the glue, the crash and the cardboard of the inner spine disintegrated.  The book has also at some point clearly been moistened on the top and outer edges, which produced this unhappy effect:

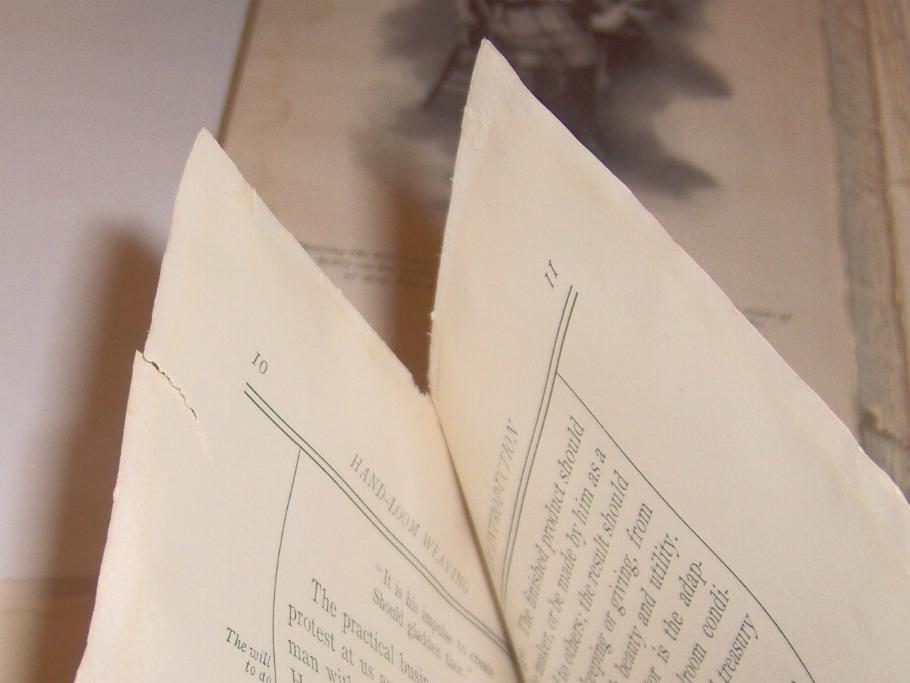
Edges of pages stuck to each other

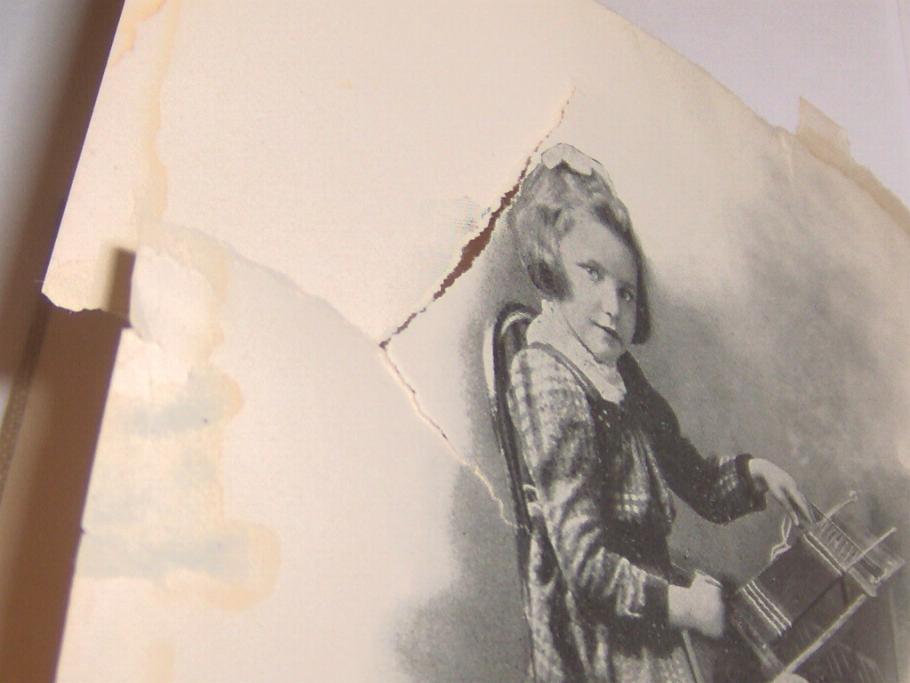
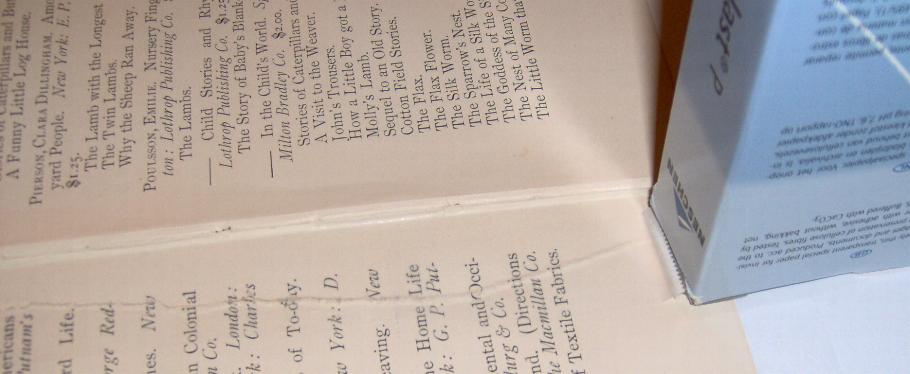
The finish of the pages turned to a paste, which did a bang-up job of making another spine out of two sides of the book one would like to have free.  Because people will try to read a book, this lead to some very sad ripping, as can be seen on the edge of page 10 just above here, and also in this next picture.

Large and somewhat dendritic tear across the top third of a page.

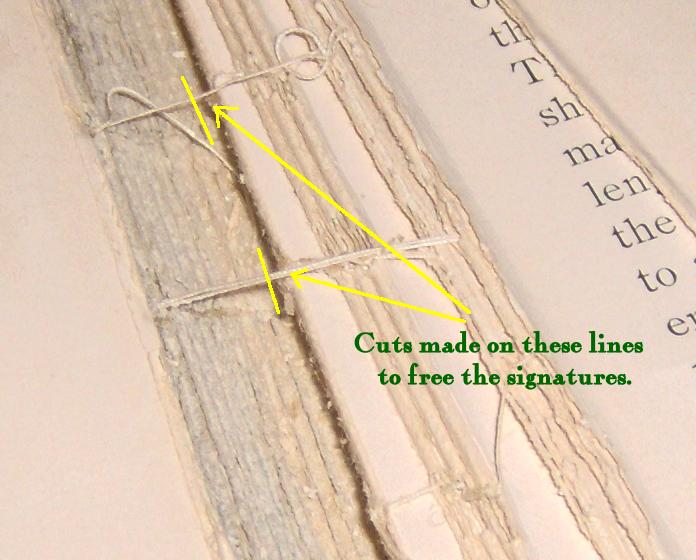
So, what's to be done about this?  The first step seems almost contrary-- finish taking the book apart.  Any attempt to just glue things back together would be essentially futile, and likely counter-productive.  So I very carefully snipped each signature of the book free from its binding and removed the residue of threads caught in each valley.

Close view of the threads of the spine.


I should make a note at this point that it's fairly important to be careful in keeping the parts of the signatures together, because some of the pages had become completely detached from their fellows (usually the ones on the outside of the signature), and if not kept together would create a bit of a nightmare in getting the thing back together.  Once they were all apart, I could get down to the business of fixing the sheets themselves.  This was done in two ways.  For rips, and as a reinforcement for the outside of each signature-- whether the outside sheet had fallen into two pieces or not, I thought it wise to stick them together-- I used what is in effect an archival-grade Scotch Tape called Filmoplast.  Do not, by the way, under any circumstances, think that Scotch Tape is a viable substitute; in a few years, or at very most a couple of decades, the adhesive will go brown and non-sticky, making a worse mess of the book than the thing you're repairing it over.

Filmoplast being applied to a tear.

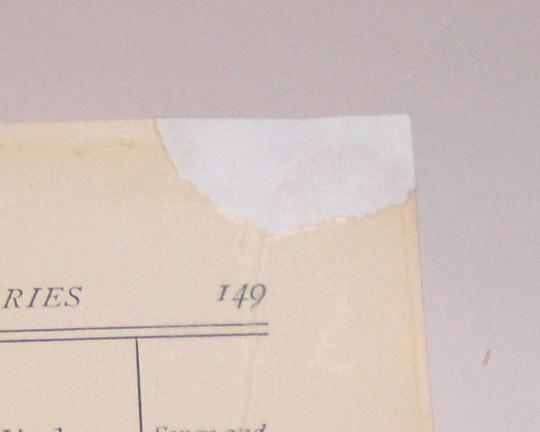
For the edges of the pages that were severely damaged (mainly, where several edges had become a single concretion of cellulose, and had to be removed), I replaced the area with some fresh paper.  This was accomplished by tearing a piece of paper to slightly larger than the missing area and pasting it in place, once again using an archival-grade adhesive; tempted though I was to cook up a batch of my own paste, I wanted to be certain of the long-term results.   I wasn't, sadly, able to match the original stock in either colour or finish, but at least the page has a good solid edge once again.

Missing page corner replaced with new paper.

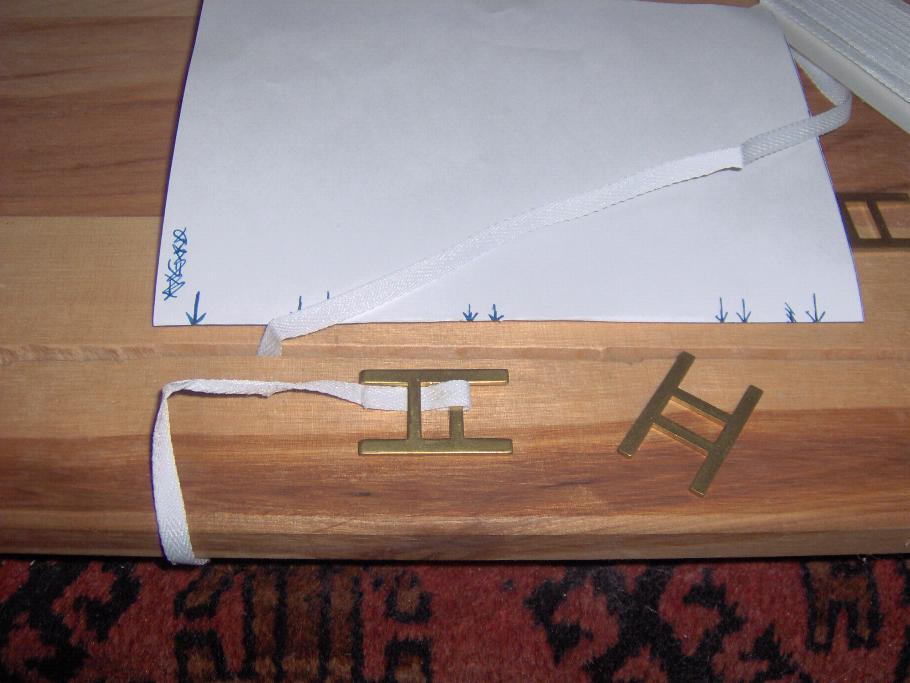
Once all these repairs were complete, and each signature was once again composed of six or seven intact folded sheets, it was time to re-sew the whole pile together into a text-block once more.  To do this, I made an extra sheet of the correct size, folded it, and measured the points for holes onto it.  It is generally best to make fresh holes when doing this sort of thing, as the old ones are usually worn and somewhat exaggerated-- certainly the case with this book.  The guide sheet is placed atop the signature, which then goes into the prettily-named stabbing frame to hold it in place while an awl is applied to make the holes.  In the picture below, you'll see indicators for eight holes-- a single one at top and bottom for the kettle-stitches, and three pairs to lie on either side of each tape.  With a small book like this, I could probably have gotten away with two tapes, but it's not a lot of extra work to have a third and it's certainly a lot of extra strength for the book-- I'm following the Mike Holmes dictum of doing it right rather than doing it easy and/or cheap.

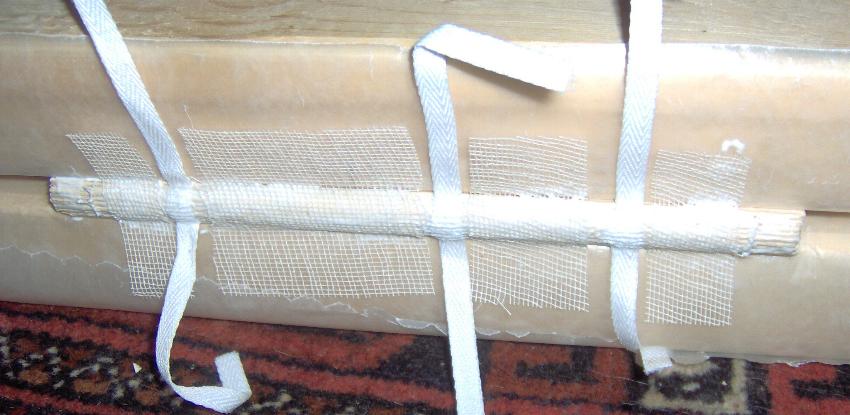
After the holes are made, the guide sheet has one more role to play in the setting up of the sewing frame, in that it's used to set the spacing for the cloth tapes.  One can use a signature for this, but one the holes are in the signatures I like to move them around as little as possible to avoid disaligning the sheets-- this is my form of laziness when binding.  The tapes are set into brass "keys" made specifically for the task (and well worth the price-- my previous jerry-rig of bent coat-hanger bits were a great trial) and lashed to the cross-bar of the sewing frame.  Once they're all positioned correctly, the cross-bar is tightened to lock everything in place.

Sewing frame, showing H-shaped keys.

The exact technique of stitching will be covered on a separate page, but I will mention that if I have been making a new cover rather than preserving the original one, I'd likely have sewn onto cords rather than tapes.  There's a little bit of extra tension on the signatures in tape-sewing that I'd prefer to avoid, but there's no room for cords under existing cover's spine (those who know what's what in binding will wonder why I didn't go with sunken cords, and the answer is an unwillingness to saw the backs of the signatures).  I want to mention here that there is also a nice little indication of the lack of automation in the original binding, in the form of a signature number on the first page of each signature.  As each one is laid atop the previous, it's clear that they're in the right order, which is something a machine wouldn't need, but us human binders really like to be reassured about.

To make a proper text-block, after sewing it is necessary to glue the signatures together in a press.  I cheated a little bit, in that I kept the rounding of the spine from the original binding rather than knocking it our and re-rounding it later-- in part this was done because of my re-using the old cover, and in part because the paper was fragile enough that I didn't want to wallop it too seriously.  In addition to the glue (a modern polyvinyl acetate formulated for long-term flexibility), I applied some crash as well, in its appropriate role as a reinforcement to glue.  The crash stops short of the ends of the block because I didn't want it getting in the way of the next step.

Glued spine with crash attached.

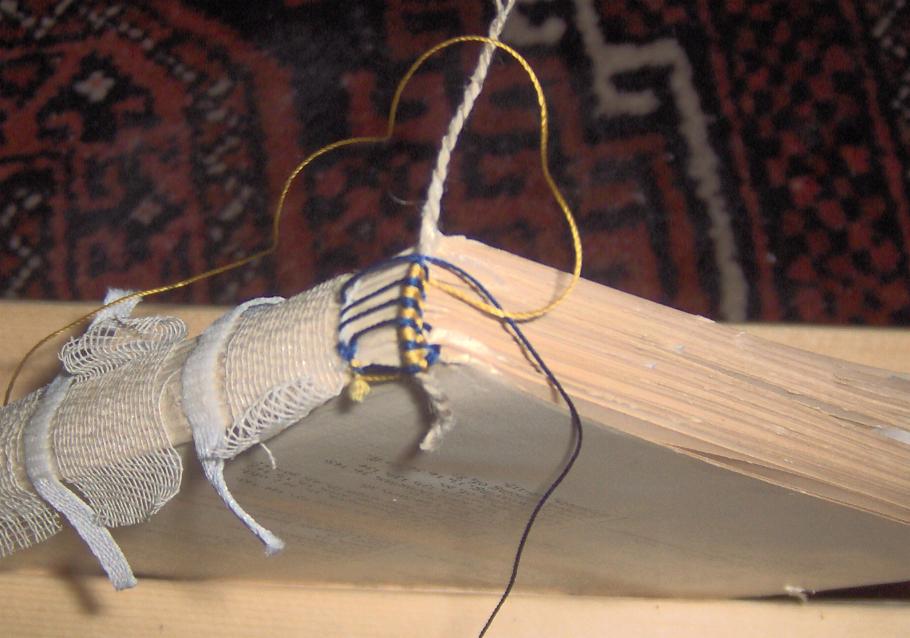
In an ideal restoration, I would at this point have trimmed the edges of the book neatly, but I was a little concerned about the ability of my plow to deal with a book of this size and flimsy nature, and also because of the way I was dealing with the rounding of the back.  With the amount of rebuilding done, the edges are actually rather more regular than at the beginning, and the lack of regularity will hopefully put off riffling through the pages with a thumb, which the fabric of the pages won't stand well.  That being said, the next step is headbanding (and tailbanding, if one is pedantic), which in addition to being decorative is a useful reinforcement for the ends of the spine.  In the original binding, there were headbands, but fake ones-- bits of rolled cloth applied to a cardboard backing, glued in place.  Those are more decorative than functional, as a proper headband gets woven and sewn through the signatures, holding together what could be loose ends.  This is just about the most time-comsuming step in the whole process, but it's well worth the level of finish it lends the book in the end.

Headband under construction.

With the headbanding completed, it's time to remarry the cover to the block.  This is done simply, in this case, by gluing the tapes and tabs of the crash to the boards of the cover (it's a little more involved if you're making a new cover).  I did pause before doing this, though, to see about clearing away some smut on the cover, using a cloth only barely moist with slightly soapy water.  As can be seen in the before and after pictures, there was some good and no damage done.  The glue for reattaching the cover is the same PVA used on the spine, and the text-block is protected with a waxed paper wrapper while the glue is setting.  Applying the boards in this way results in a "hollow backed" book, and for absolute completeness I should have built a little internal device out of cardboard to give the outer spine something to cling to, but in this case the original cover was such a study item it seemed unnecessary, and I frankly doubt I could have got one to fit into the space available.

Shows tapes and tabs glued in place.
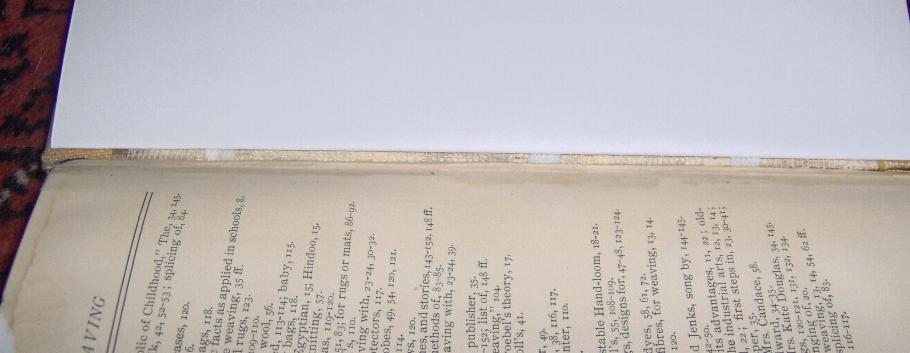
The finishing touch is to insert some new end-papers to cover the boards, tapes, and crash, which are not altogether beautiful as seen above.  I used some fairly simple endpapers, of the sort that one would call "tipped in" had I just glued the spineward 1/8" or so to the outer page of the text block (which is precisely what was done with the original ones).  For the sake of lasting strength, I used a broad linen tape to cover the remaining gap show in the picture below, which was made specifically as a book-hinge; strangely, I appear to have neglected to take a picture of the final product, so I'll have to ask you to use your imagination to apply an off-white rectangle which sticks to equal amounts of the end paper and the text page and conceals the little bit of tape peeking out below quite nicely.

End paper in place, with just a hint of tapes visible beneath it.

So, there's the process completed.  I won't say "as good as new" because the acid in the paper has been doing itself an injury for 90+ years, but certainly more of a book than a book-shaped collection of loose pages.


Link to Main Page  


Website design by Dirck de Lint, renaissance thug, with the great assistance of Document made with Nvu